Configuring SSO in Azure AD
How do I configure SSO in Azure?
Configuring in Azure AD
Here is our How-to guide for configuring SSO with your Azure AD account.
- Login to your Azure Portal https://portal.azure.com/
- Navigate to Enterprise Applications
- Click on 'New Application'
- Select 'Create your own application'
- Name your application and select 'Integrate any other application you don't find in the gallery (Non-gallery)'

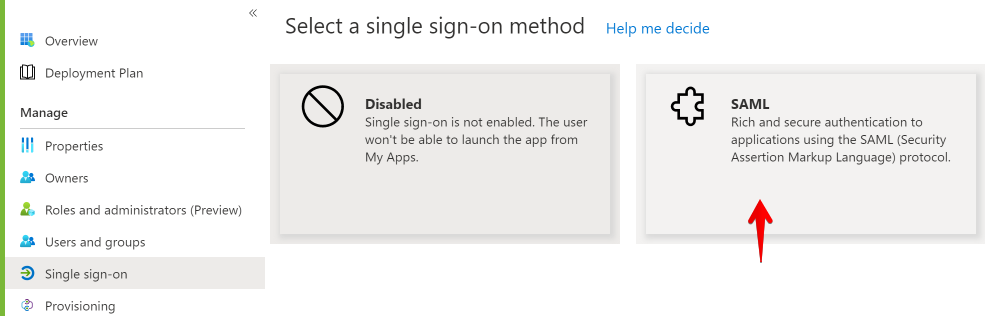
- Select 'Single sign-on' in the left side menu.
- Select SAML
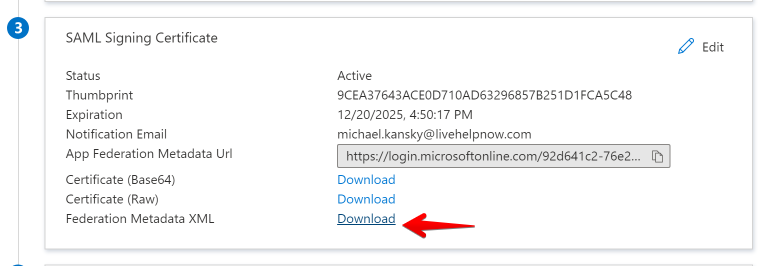
- Download Federation Metadata XML
- Upload the downloaded XML file while configuring Single Sign-On app within LiveHelpNow admin panel. This will auto-populate the fields below.
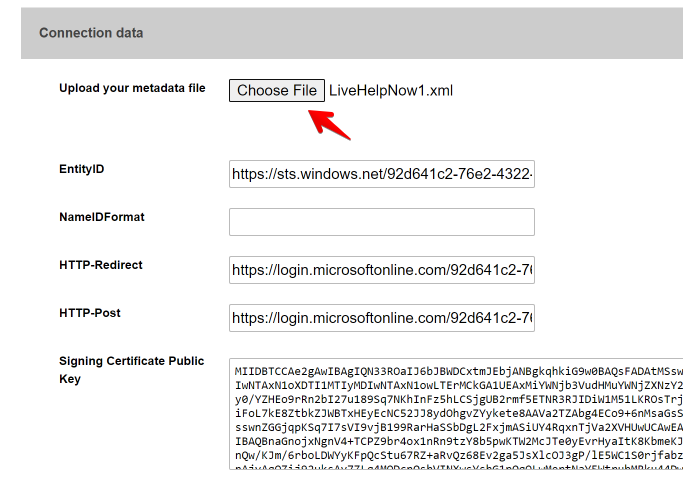
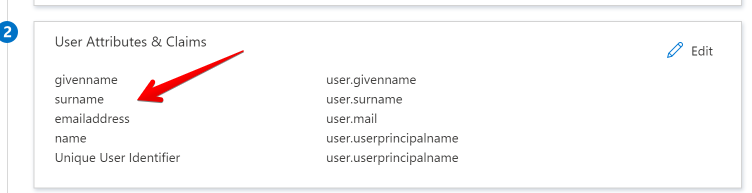
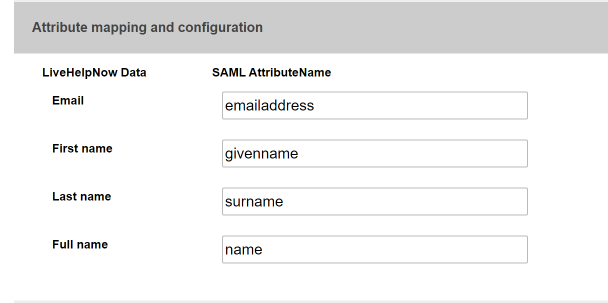
- To correctly configure Field/Attribute Mapping, please use the attribute names listed in section #2 of your SAML app in Azure.
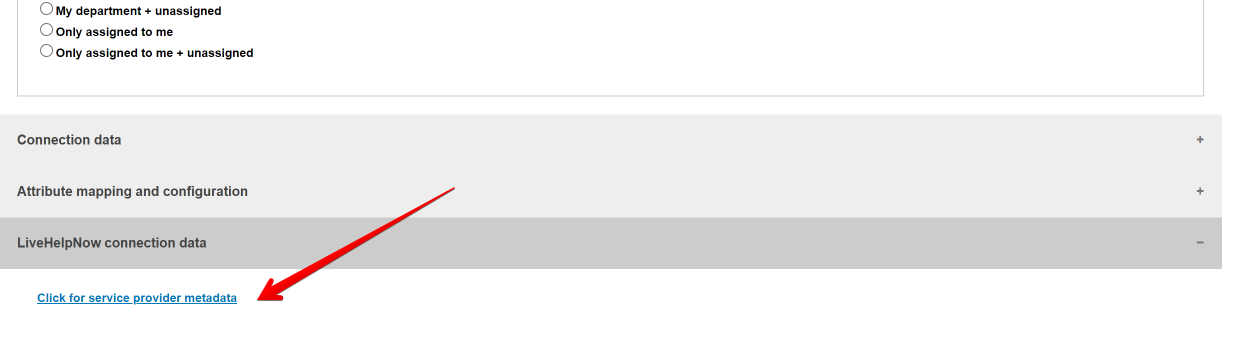
- Download LiveHelpNow metadata for your Single Sign-On app by pressing the link highlighted below.
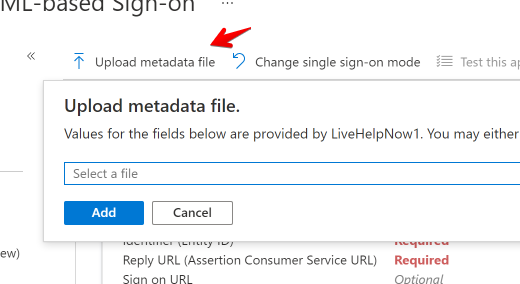
- Upload LiveHelpNow metadata XML file in Azure SAML app settings
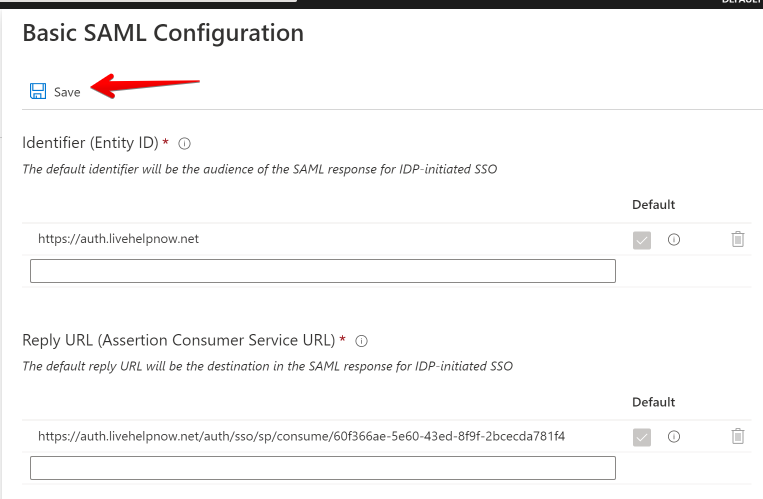
- Save the App
Here is our general guide on configuring SSO
If you have any questions or need further assistance, please feel free to email us at [email protected] or start a chat with us, we're here to help.